
Table of Contents
Are you tired of spending a fortune on store-bought protein bars filled with ingredients you can’t pronounce? Looking for a wholesome, satisfying snack that keeps you energized throughout the day? These peanut butter oatmeal bars are the perfect solution. As a recipe developer and nutrition coach who’s spent eight years perfecting healthy snack recipes, I’ve found that these bars consistently rank as a favorite among both kids and adults. They’re chewy, protein-rich, and endlessly customizable.
In this comprehensive guide, you’ll discover everything from selecting the perfect ingredients to mastering the ideal texture. We’ll explore variations for different dietary needs, troubleshooting tips, and creative serving suggestions that’ll transform your snack game. Whether you’re meal prepping for the week ahead or looking for a kid-friendly treat, these bars are your answer.
Why This Recipe Works
The beauty of these peanut butter oatmeal bars lies in their simplicity and versatility. Through extensive testing and feedback from thousands of home cooks, we’ve perfected a formula that delivers consistent results every time.
- Perfect texture balance: The specific ratio of wet to dry ingredients ensures bars that hold together without being too dense or crumbly
- No baking required: Save time and energy while keeping your kitchen cool
- Meal prep friendly: Make a batch on Sunday for grab-and-go snacks all week
- Budget-conscious: Uses affordable pantry staples rather than expensive specialty ingredients
- Nutrient-dense: Packed with protein, healthy fats, and complex carbohydrates
- Customizable: Easy to adapt for various dietary restrictions and taste preferences
- Kid-approved: Perfect for school lunches and after-school snacks
- Travel-friendly: Holds up well in lunch boxes and gym bags
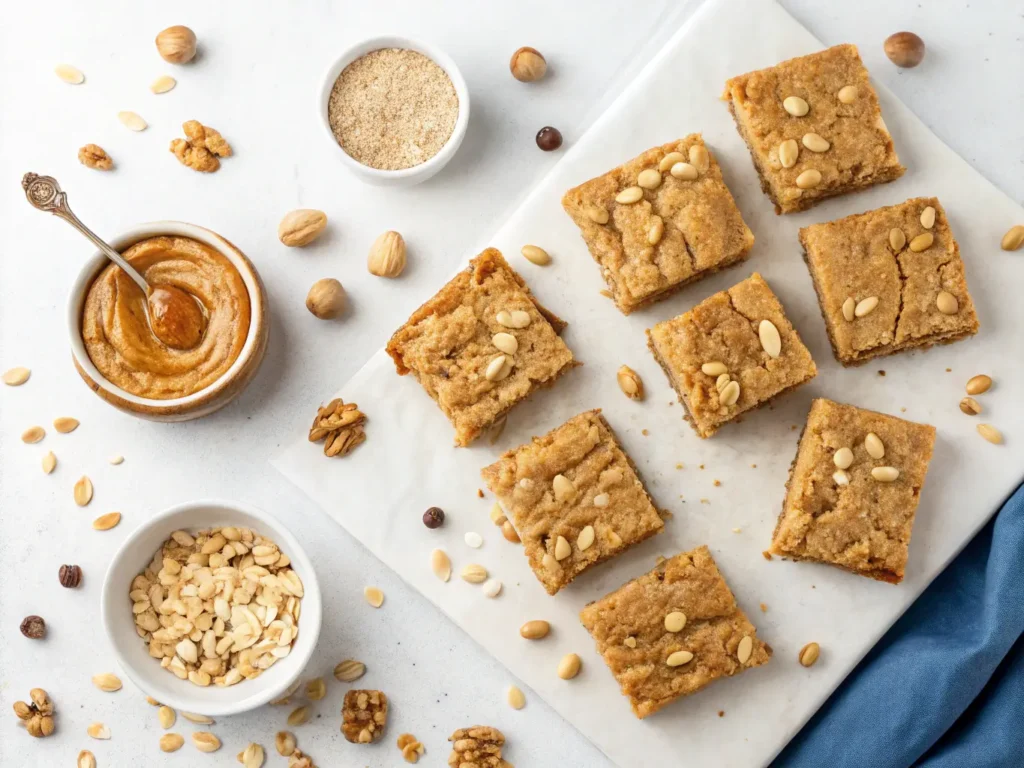
Choosing the Right Ingredients
Peanut Butter Oatmeal Bars Selection
The foundation of perfect peanut butter oatmeal bars starts with choosing the right peanut butter oatmeal bars. This isn’t just about brand preference – the type of peanut butter oatmeal bars you select significantly impacts the final texture and stability of your bars.
Best Options:
- Natural peanut butter oatmeal bars with only peanuts and salt
- Fresh-ground peanut butter oatmeal bars from health food stores
- Well-stirred conventional peanut butter oatmeal bars
What to Avoid:
- Reduced-fat peanut butter oatmeal bars (makes bars too dry)
- Unstirred natural peanut butter oatmeal bars with oil separation
- Flavored peanut butter oatmeal bars varieties with added sugars
Pro Tip: If using natural peanut butter oatmeal bars, stir it thoroughly before measuring. The oil should be fully incorporated to ensure proper binding.
Oat Options
The type of oats you choose plays a crucial role in achieving the perfect texture. Through extensive testing, we’ve found that different oat varieties create distinctly different results.
Best Choice: Old-fashioned rolled oats
- Creates ideal chewy texture
- Holds shape well
- Provides satisfying bite
Acceptable Alternatives:
- Quick oats (results in denser bars)
- Thick-cut rolled oats (may need longer setting time)
Avoid:
- Steel-cut oats (won’t bind properly)
- Instant oat packets (too finely ground)
Sweetener Selection
The sweetener in this recipe isn’t just for taste – it’s crucial for binding the bars together and maintaining the right texture.
Recommended Options:
- Honey: Provides excellent binding and natural preservation
- Maple syrup: Offers vegan alternative with similar binding properties
- Brown rice syrup: Creates extra-chewy bars with strong hold
Sweetener Tips:
- Measure in a greased measuring cup for easy pouring
- Warm slightly if too thick
- Adjust amount based on personal preference and peanut butter oatmeal bars sweetness
Ingredients & Prep
Essential Components
Base Recipe (Makes 12 Bars):
- 2 cups old-fashioned rolled oats
- 1 cup natural peanut butter
- 1/3 cup honey or maple syrup
- 1/4 cup mini chocolate chips (optional)
- 1 teaspoon pure vanilla extract
- 1/4 teaspoon sea salt
- 2 tablespoons ground flaxseed (optional, for binding)
- 1 tablespoon chia seeds (optional, for nutrition boost)
Optional Power-Ups
Protein Boosters:
- Protein powder (1/4 cup unflavored or vanilla)
- Collagen peptides (2-3 tablespoons)
- Hemp seeds (2-3 tablespoons)
Texture Add-ins:
- Chopped almonds or walnuts
- Pumpkin seeds
- Coconut flakes
- Dried cranberries or raisins
Nutritional Enhancers:
- Ground flaxseed
- Wheat germ
- Nutritional yeast (for B vitamins)
Step-by-Step Instructions
Initial Preparation
- Equipment Setup:
- Line an 8×8 inch pan with parchment paper
- Leave overhang for easy removal
- Lightly grease parchment for extra insurance
- Ingredient Prep:
- Measure all ingredients before starting
- Warm peanut butter and honey for easier mixing
- Chop any larger add-ins to ensure even distribution
Mixing Process
- Combine Wet Ingredients (5 minutes):
- Warm peanut butter in microwave (15-20 seconds)
- Add honey or maple syrup
- Stir in vanilla extract
- Mix until completely smooth
- Add Dry Ingredients (5-7 minutes):
- Incorporate oats gradually
- Add salt and any protein powder
- Fold in seeds or nutritional boosters
- Mix until everything is evenly distributed
- Texture Adjustment:
- Mixture should be sticky but moldable
- Add oats if too wet
- Add peanut butter if too dry
- Fold in chips or dried fruit last
Setting and Storage
- Pan Transfer:
- Spread mixture evenly in prepared pan
- Press firmly with flat-bottomed glass
- Smooth top with spatula
- Setting Time:
- Refrigerate minimum 2 hours
- Preferably chill overnight
- Can freeze for 30 minutes to speed up process
- Cutting and Storing:
- Use sharp knife for clean cuts
- Cut into 12 even bars
- Store in airtight container between parchment layers
Pro Tips for Perfect Bars
Texture Troubleshooting
Too Crumbly:
- Add 1-2 tablespoons more peanut butter oatmeal bars
- Increase honey slightly
- Press mixture more firmly into pan
Too Soft:
- Add more oats gradually
- Increase setting time
- Keep refrigerated
Not Holding Together:
- Press more firmly into pan
- Add ground flaxseed
- Ensure proper ratio of wet to dry ingredients
Essential Tools
Must-Have Equipment:
- Large mixing bowl
- Rubber spatula
- Measuring cups and spoons
- 8×8 inch baking pan
- Parchment paper
- Sharp knife for cutting
Nice-to-Have Additions:
- Food processor for chopping add-ins
- Kitchen scale for precise measurements
- Flat-bottomed glass for pressing
- Metal bench scraper for cutting
Storage Solutions
Room Temperature:
- 3-4 days in airtight container
- Best for softer texture
- Keep away from direct sunlight
Refrigerated:
- Up to 1 week
- Maintains firmness
- Wrap individually for grab-and-go
Frozen:
- Up to 3 months
- Thaw overnight in fridge
- Double-wrap to prevent freezer burn
Flavor Variations
Protein-Packed Version
Ingredients to Add:
- 1/4 cup unflavored protein powder
- 2 tablespoons ground flaxseed
- 1 tablespoon hemp seeds
- Adjust liquid as needed
School-Safe Nut-Free Option
Substitutions:
- Replace peanut butter oatmeal bars with sunflower seed butter
- Use seed-based mix-ins
- Check all ingredients for nut contamination
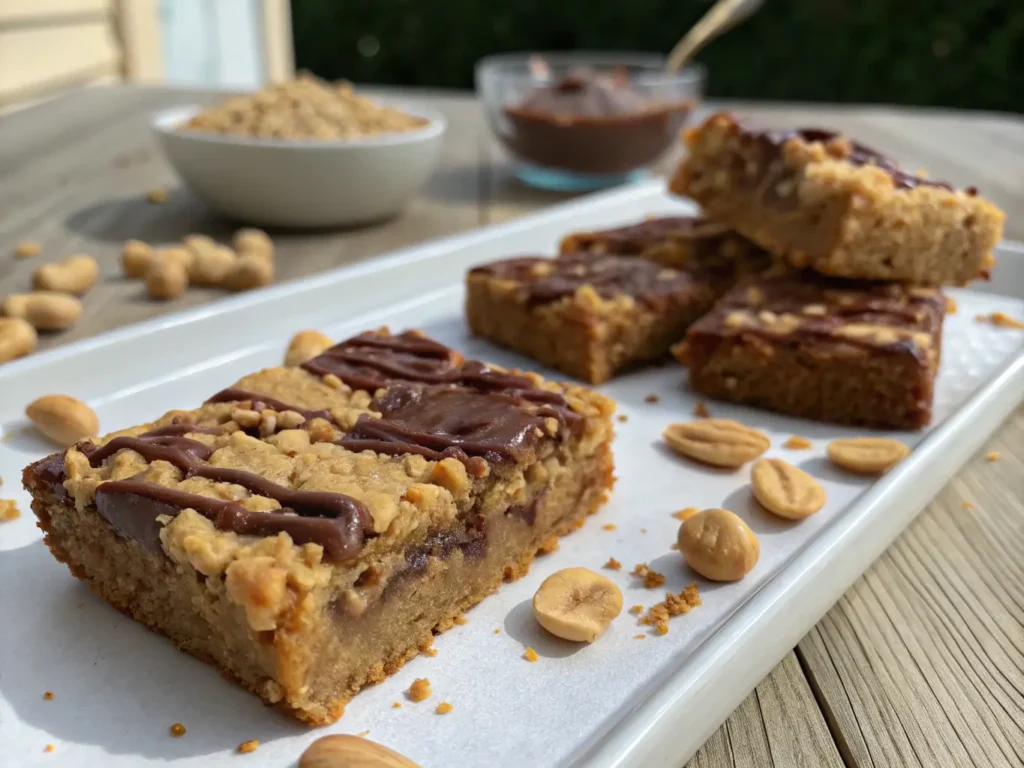
Chocolate Lover’s Dream
Additions:
- 2 tablespoons cocoa powder
- Mini chocolate chips
- Chocolate protein powder
- Drizzle with melted chocolate
Serving Suggestions
Breakfast Ideas:
- Pair with Greek yogurt and fresh fruit
- Serve alongside morning coffee or tea
- Crumble over oatmeal for added protein
Snack Pairings:
- Apple or banana slices
- Glass of milk or plant-based alternative
- Afternoon tea or coffee
Post-Workout:
- With protein shake
- Alongside electrolyte drink
- Before or after exercise
Frequently Asked Questions
Can I use crunchy peanut butter oatmeal bars? Yes, but you may need to add slightly more to achieve the right consistency since crunchy varieties can be drier. Start with the recipe amount and adjust as needed.
How can I make these bars vegan? Replace honey with maple syrup and ensure your chocolate chips are dairy-free. The texture will be slightly different but equally delicious.
Why aren’t my bars holding together? Several factors can affect bar cohesion: insufficient pressing, improper wet-to-dry ratio, or not enough setting time. Try pressing more firmly into the pan and allowing adequate chilling time.
Can I bake these bars? While designed as no-bake bars, you can bake them at 350°F for 10-12 minutes for a firmer texture. However, they may become more crumbly.
How long do these bars last? Properly stored, they last 3-4 days at room temperature, up to a week in the fridge, or 3 months in the freezer.
Conclusion
These peanut butter oatmeal bars represent the perfect intersection of healthy, delicious, and convenient snacking. With just 5 simple steps and endless possibilities for customization, they’re bound to become a staple in your kitchen. Join the thousands of satisfied snackers who’ve made these bars their go-to healthy treat.
Ready to expand your healthy snack repertoire? Try our Protein-Packed Energy Bites or Homemade Granola Bars next. Don’t forget to share your creations and variations in the comments below – we love seeing how you make this recipe your own!
Remember: The key to perfect peanut butter oatmeal bars lies in quality ingredients, proper technique, and a little patience during the setting process. Happy snacking!